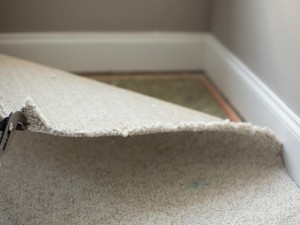
Home Improvement Tips; That old carpet has been around for years, and it’s lost it’s luster, it’s not soft anymore, there are unpadded spots, and there’s some strange smell in the house.
So you want to remove your carpet? It’s easier than you think, but it’s going to be messy. First thing you should have is a carpet knife. This is a sharp knife with a hooked blade, and this makes slicing into the carpet and under layer much easier.
Starting from one wall, make long incisions in the carpet, around 18 inches wide. First timers often forget this, and end up having huge sections of carpet that are unwieldy and heavy to pick up, let alone dispose of. The thinner strips roll much easier, and are lighter and smaller.
The underlayer may or may not come up when you cut the carpet, and that’s ok. It’s tacked on in areas, and usually pulls up quite easily. The edges of the room, where the carpet meets the wall, you’ll find tack strips, which are thin wood strips nailed to the floor with smaller tacks sticking up, and this is what holds the carpet in place.
The tackwood can be removed relatively easily, the best way to do this is loosen each nail that holds it to the floor with a crowbar, and gently work it back and forth and eventually the entire thing will just pop out of the floor in one piece. Don’t be frustrated if this doesn’t happen, however, it breaks easily too, and you’re likely to have some wood splinters lying about.
Once the carpet is rolled and out of the house, and the underlayer is similarly done, and the wood tack strips are removed, you can begin to decide what your next step is. If you want to put new carpet in, if you want to put in flooring, whether laminate or tile, or if the floor underneath just needs a little tender loving care to make it shine in brilliance. Each section of home improvement is a chore, and most tasks are generally not something you can get to in one weekend, anything dealing with flooring, especially.

Take your time, consult with professionals, and in no time you’ll be pleased with your own handiwork.
Read more DIY tips here on Decor Ideas